Installation
Compatibility
Compatibility
Important: PlayMaker 2 is not backwards compatible with PlayMaker 1. Importing PlayMaker 2 into a PlayMaker 1 project will cause issues.
- Incompatible with Entities package in Unity versions earlier than 6.5.
Requirements
- Unity 2022.3 LTS or higher is required.
- Pre-release versions of Unity are not officially supported and may cause unexpected behavior.
Backups and Version Control
Use Version Control with your Unity Projects so you can see changes and revert to earlier versions if needed.
If you don’t use version control (which is highly recommended), please make sure to backup your project before importing PlayMaker.
Installation Process
Installing PlayMaker is a 2 step process:
- Import the PlayMaker Installer package.
- Use the installer to import the latest version of PlayMaker.
This 2 step process allows the installer to check for potential problems and do some housekeeping before importing PlayMaker files.
Importing PlayMaker Installer
Follow the directions for the store where you bought PlayMaker:
Use the Unity Package Manager to find and import the latest PlayMaker package.
- Download the zip file from the link you received.
- Unzip the file in a convenient location.
- In Unity, select:
Assets > Import Package > Custom Package - Import the unitypackage for the nearest earlier Unity version. For example, use the 6.0 package for Unity 6.1.
Running the Installer
After importing, wait for Unity to finish importing files and compiling scripts.
The Install Window should then appear:
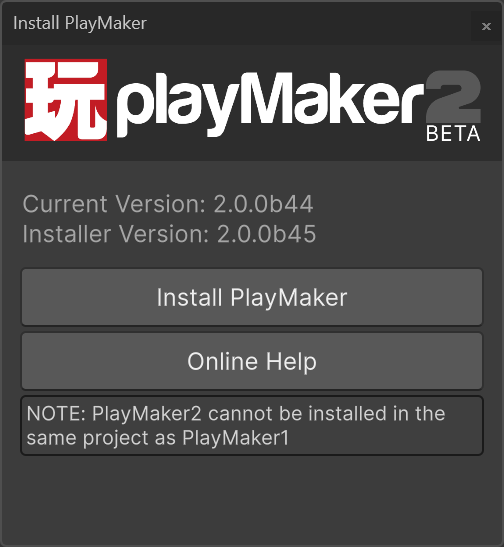
Or open it from the menu:
PlayMaker → Install
Click Install PlayMaker to complete the import.
Updating Unity
After updating a project to a different Unity version, PlayMaker may need to be re-installed for that version of Unity.
If PlayMaker detects this, it will show a popup with instructions. Import the PlayMaker Installer package for the new Unity version, then wait for Unity to finish importing files and compiling scripts.
The Install Window should open automatically. If it does not, open it from the menu:
PlayMaker → Install
Click Install PlayMaker to finish updating PlayMaker for the current Unity version.
About Window
After installing, you can check the version of PlayMaker in the About Window:
PlayMaker → Help → About PlayMaker...
Troubleshooting
If you encounter problems during installation, see our Troubleshooting guide.